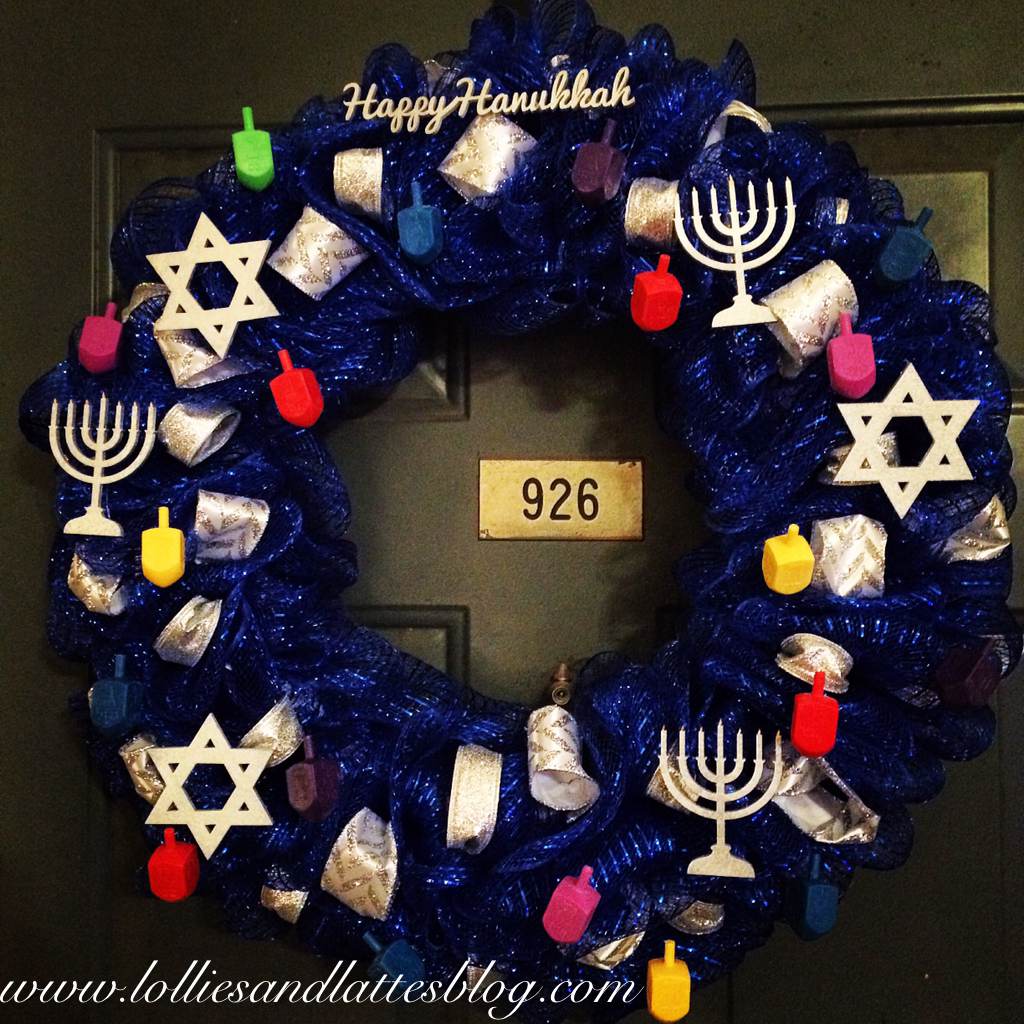
Nothing says the holidays (or in my case, any holiday) like a festive door decoration! I decided that I would take my wreath crafting skills away from the football genre and try my luck at a Hanukkah wreath!
Making a mesh wreath is a breeze, really. The only part that may take time is getting everything you need together if you need to order anything online. Here in Texas, Hanukkah wreath décor can be very difficult to find. Also, I am very impatient when it comes to waiting for spray paint to dry.
These instructions can be used to make any kind of wreath for any kind of holiday during any kind of season. If you make a mesh wreath for yourself or a loved one, please post a photo in the comments so I can see your beautiful creation!
What You Will Need
Styrofoam Wreath
Floral Pins
2 Spools of 5 1/2″ Mesh
7/8″ Roll of Ribbon
1 1/2″ Roll of Ribbon
Wooden Cutouts of Your Choice
Silver Spray Paint
Dreidels
Hot Glue Gun & Glue Sticks
Optional: Hanukkah Music & Latkes
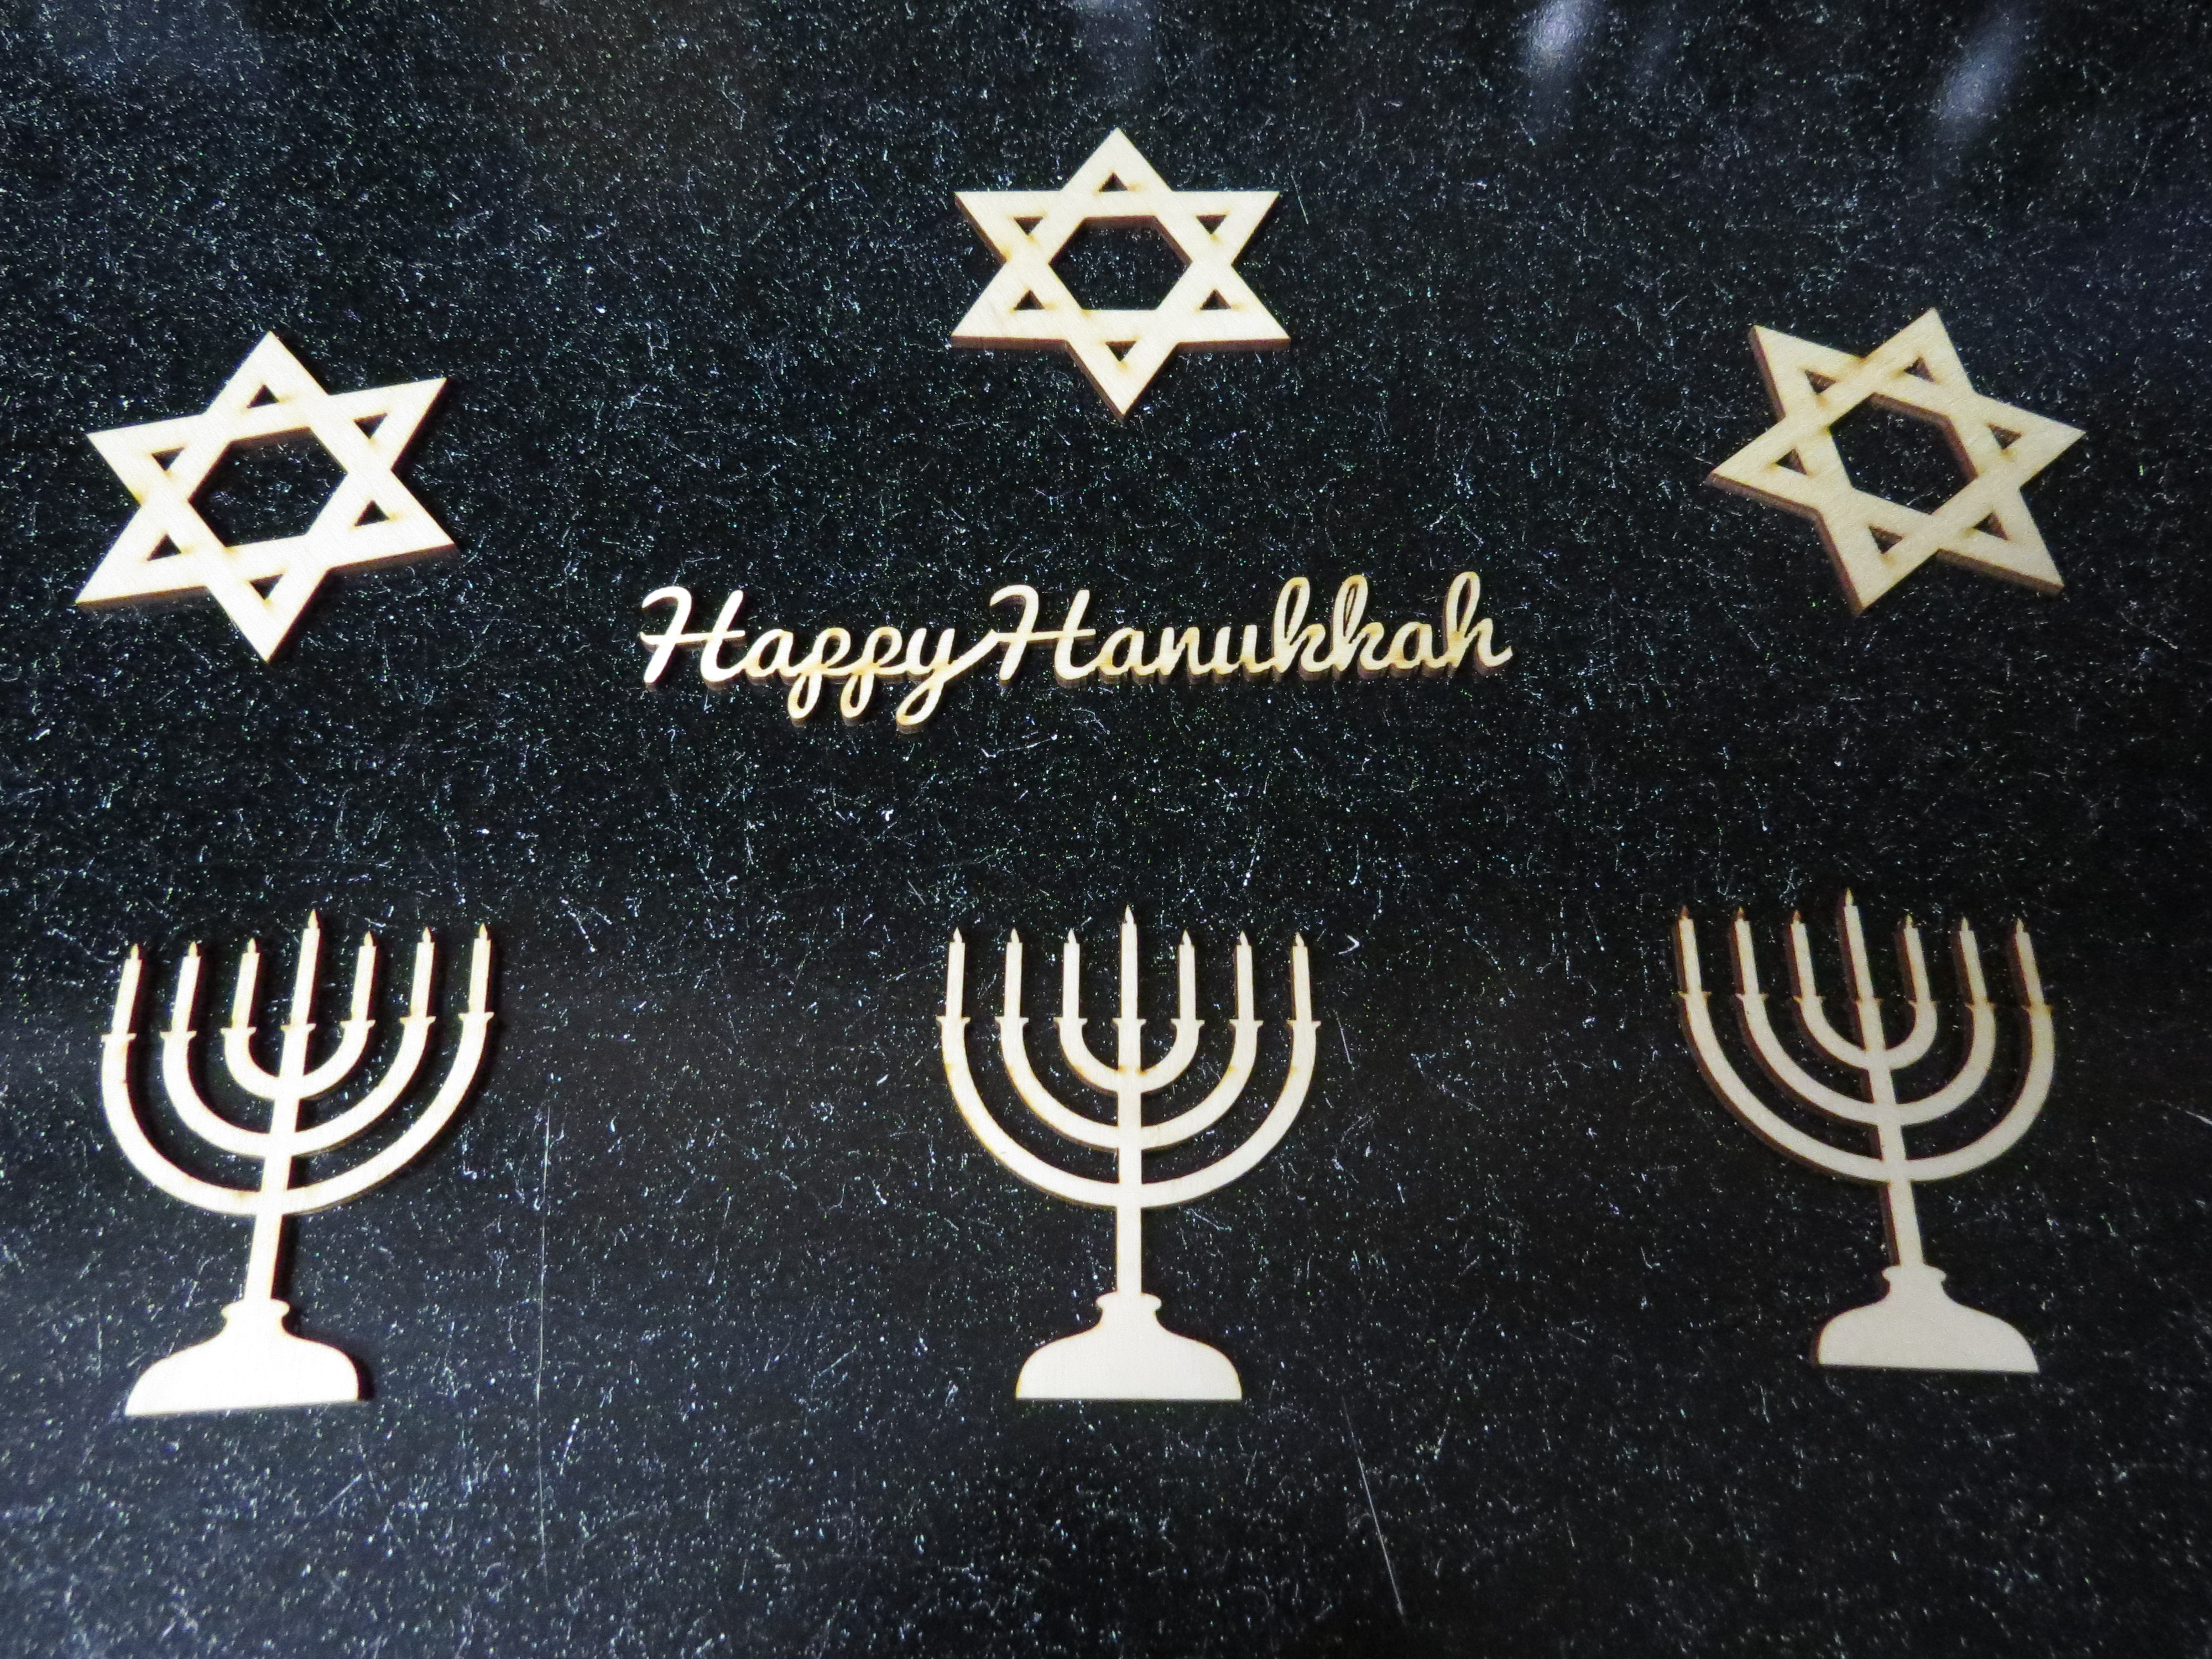
1. I purchased some wooden cutouts from Etsy. The “Happy Hanukkah” and Stars of David came from CutLineCraft and the menorahs came from a store that apparently has shut down in the past couple of weeks. Unfortunately, the “Happy Hanukkah” cutout was broken. However, based on the shipper’s packaging, it was not for lack of trying to keep it safe. I was so excited about actually finding wooden menorahs that I did not pay attention to the fact that they are short two candles. Oh well.
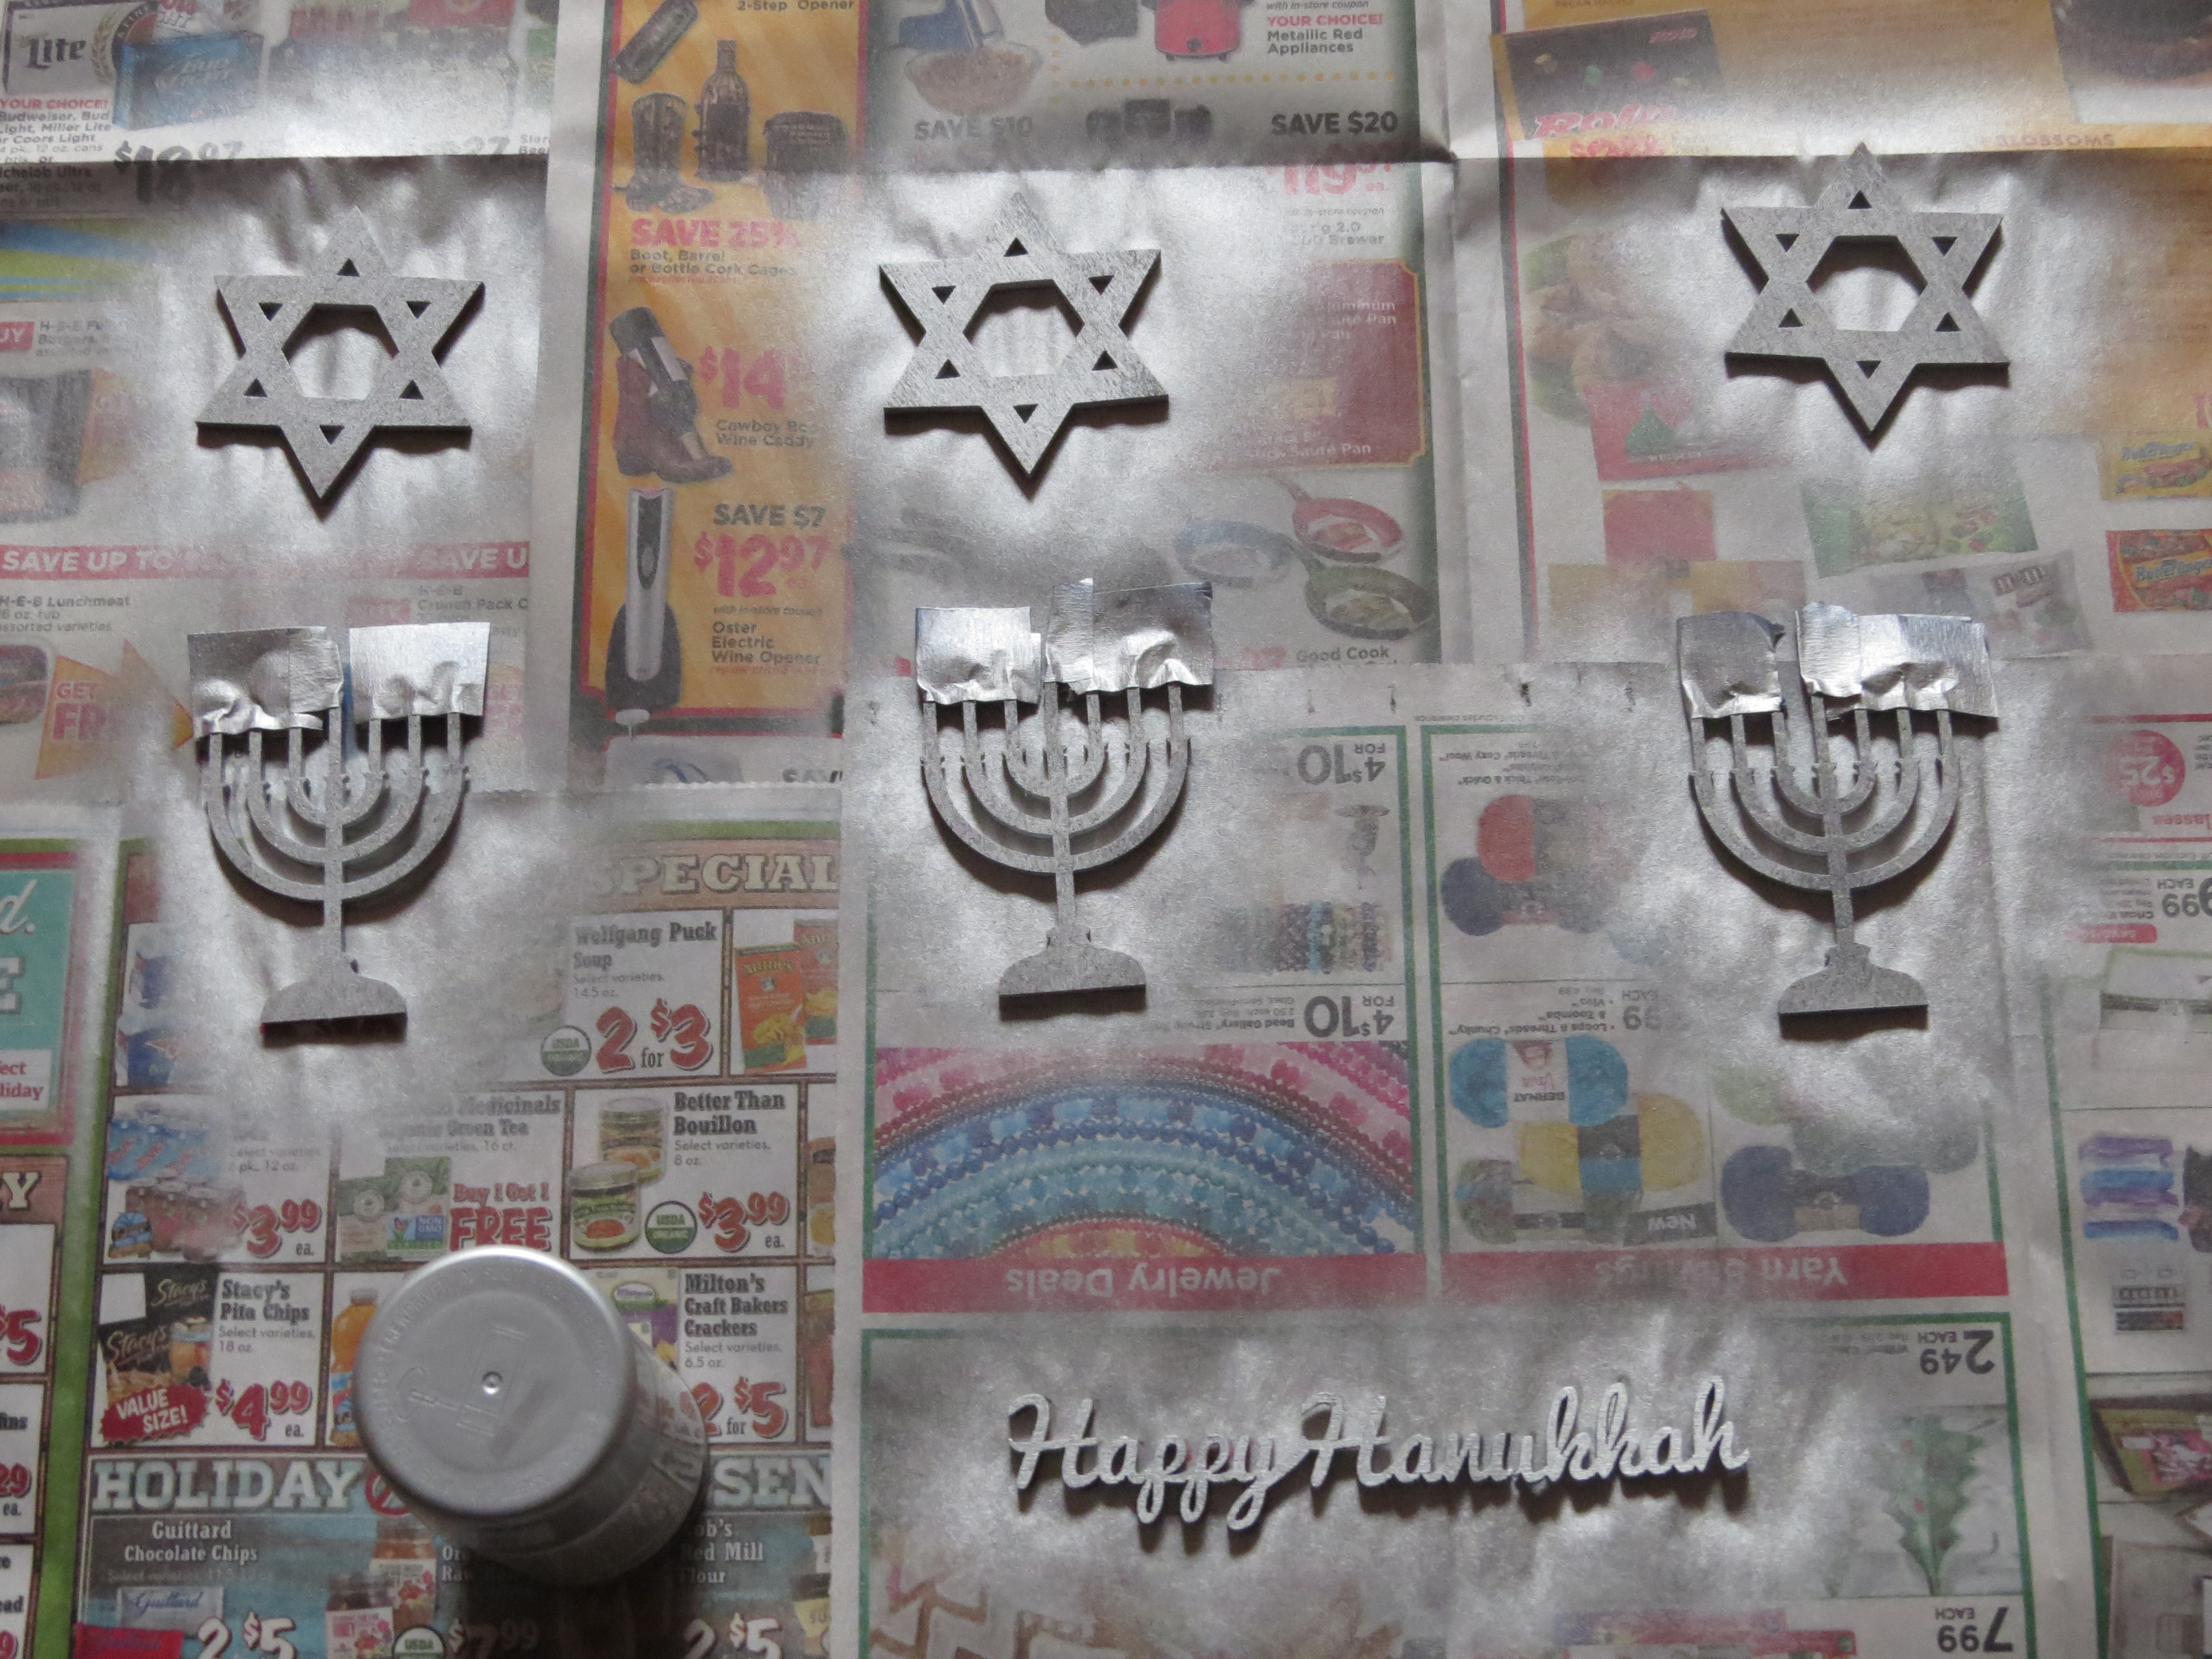 2. I placed painter’s tape over the tiny candles of the menorahs to keep them golden. I sprayed each side of the cutouts with silver spray paint.
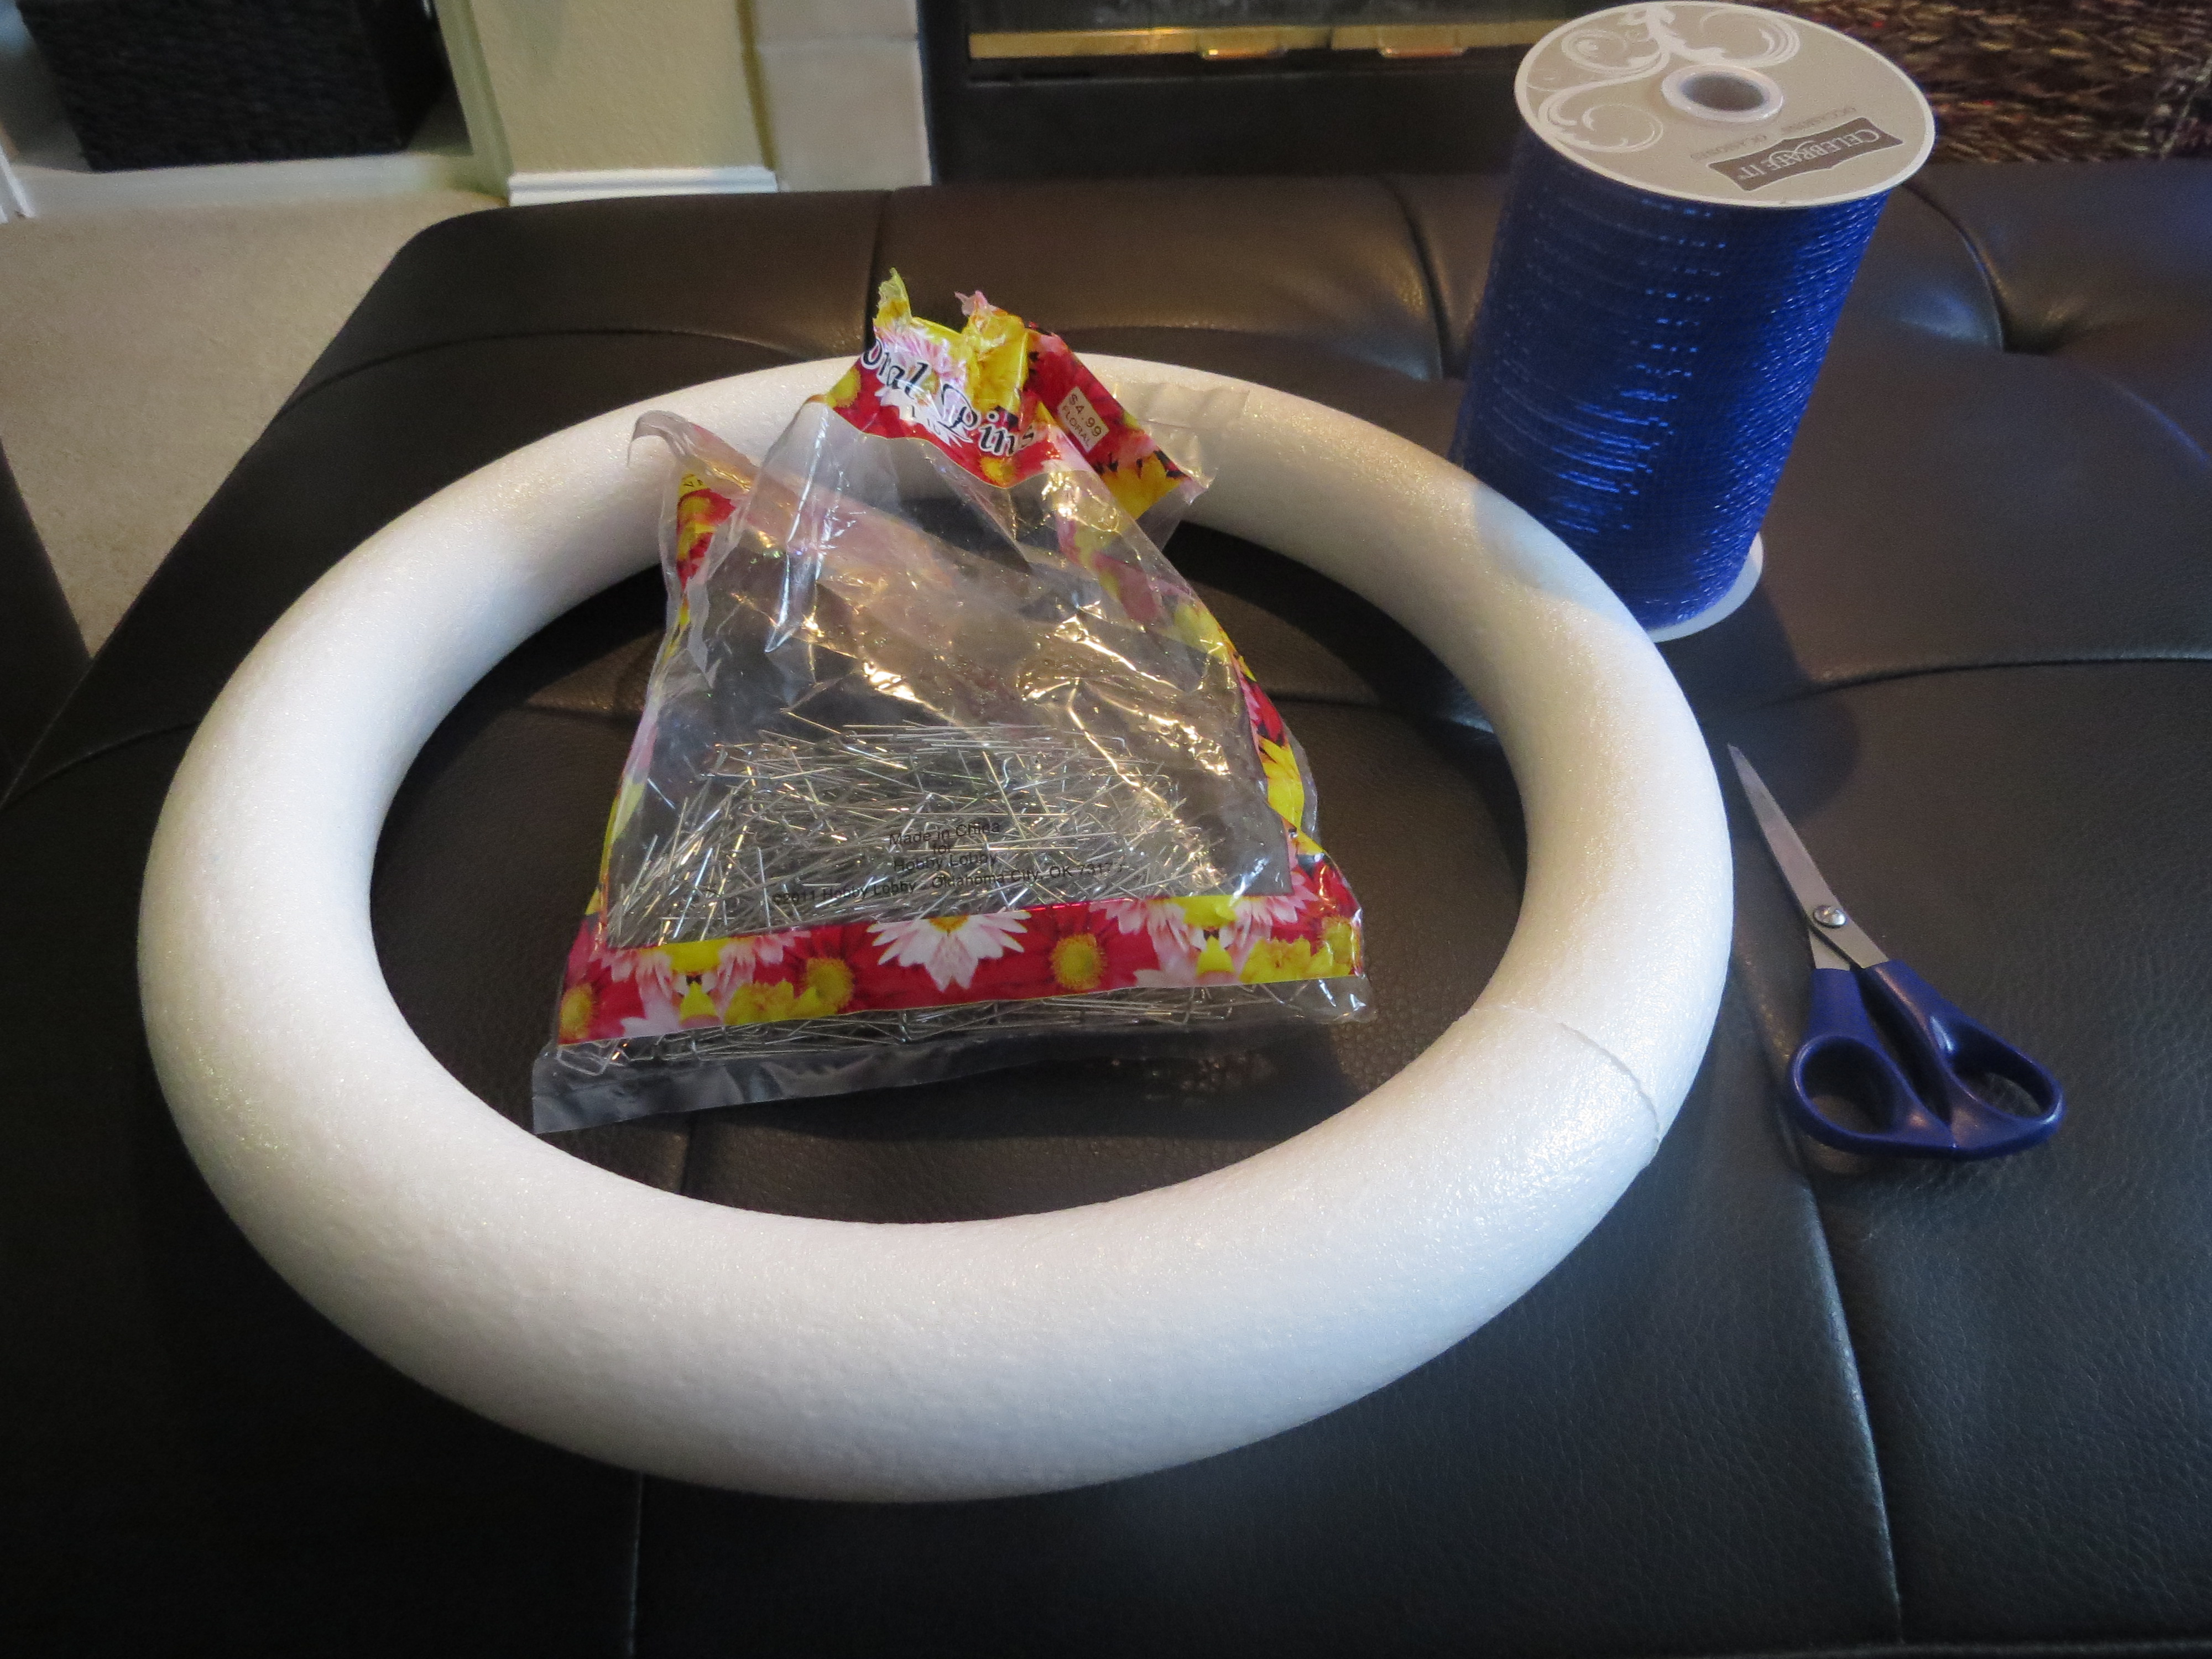
3. Next, I gathered the Styrofoam wreath, mesh, and floral pins. Unfortunately, I grabbed the wrong mesh. If you are lazy like me and do not plan on wrapping your Styrofoam in ribbon first (which you probably should), you will want a more opaque mesh than I picked out. This is why I ended up having to use two spools instead of my usual one.
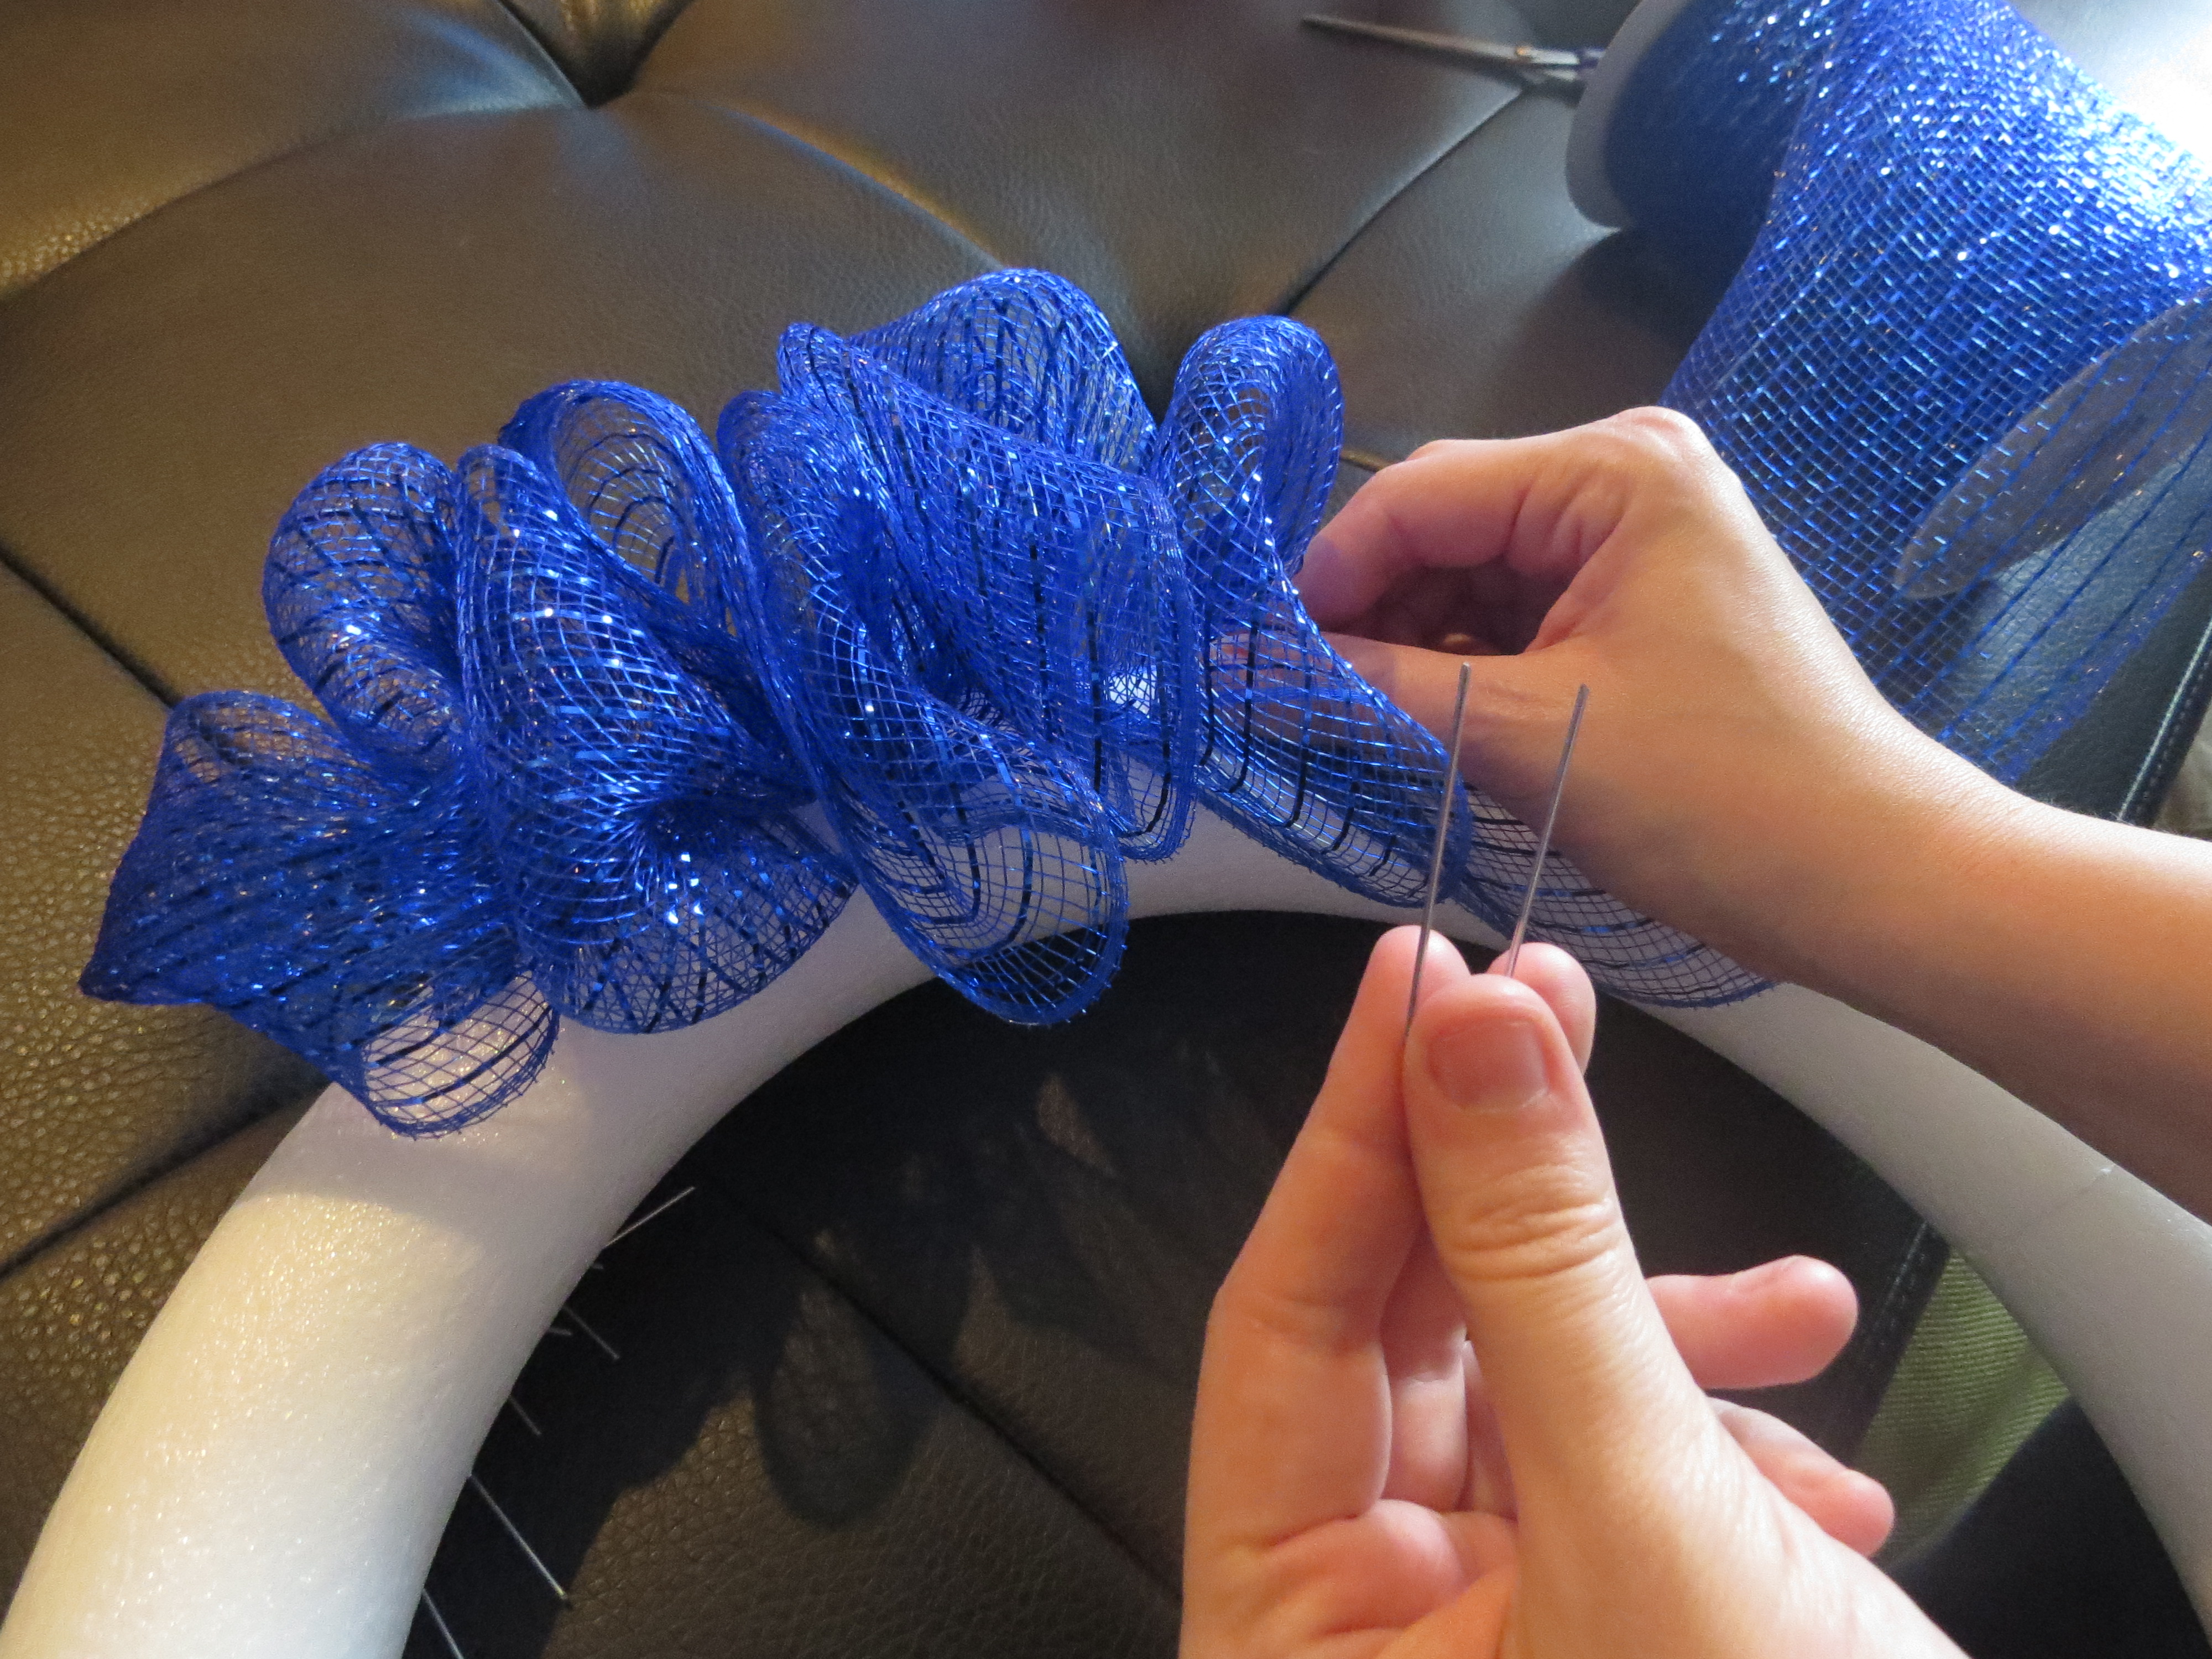
4. I started on the outer edge of the wreath by gathering the mesh and pinning it to the wreath with the floral pins. I went around the entire outer edge like this.

5. Next, I did the same thing around the entire front of the wreath. As you can see, the inner edge of the wreath is still visible. This was my first time using a rounded edge wreath as opposed to a flat-edge one.
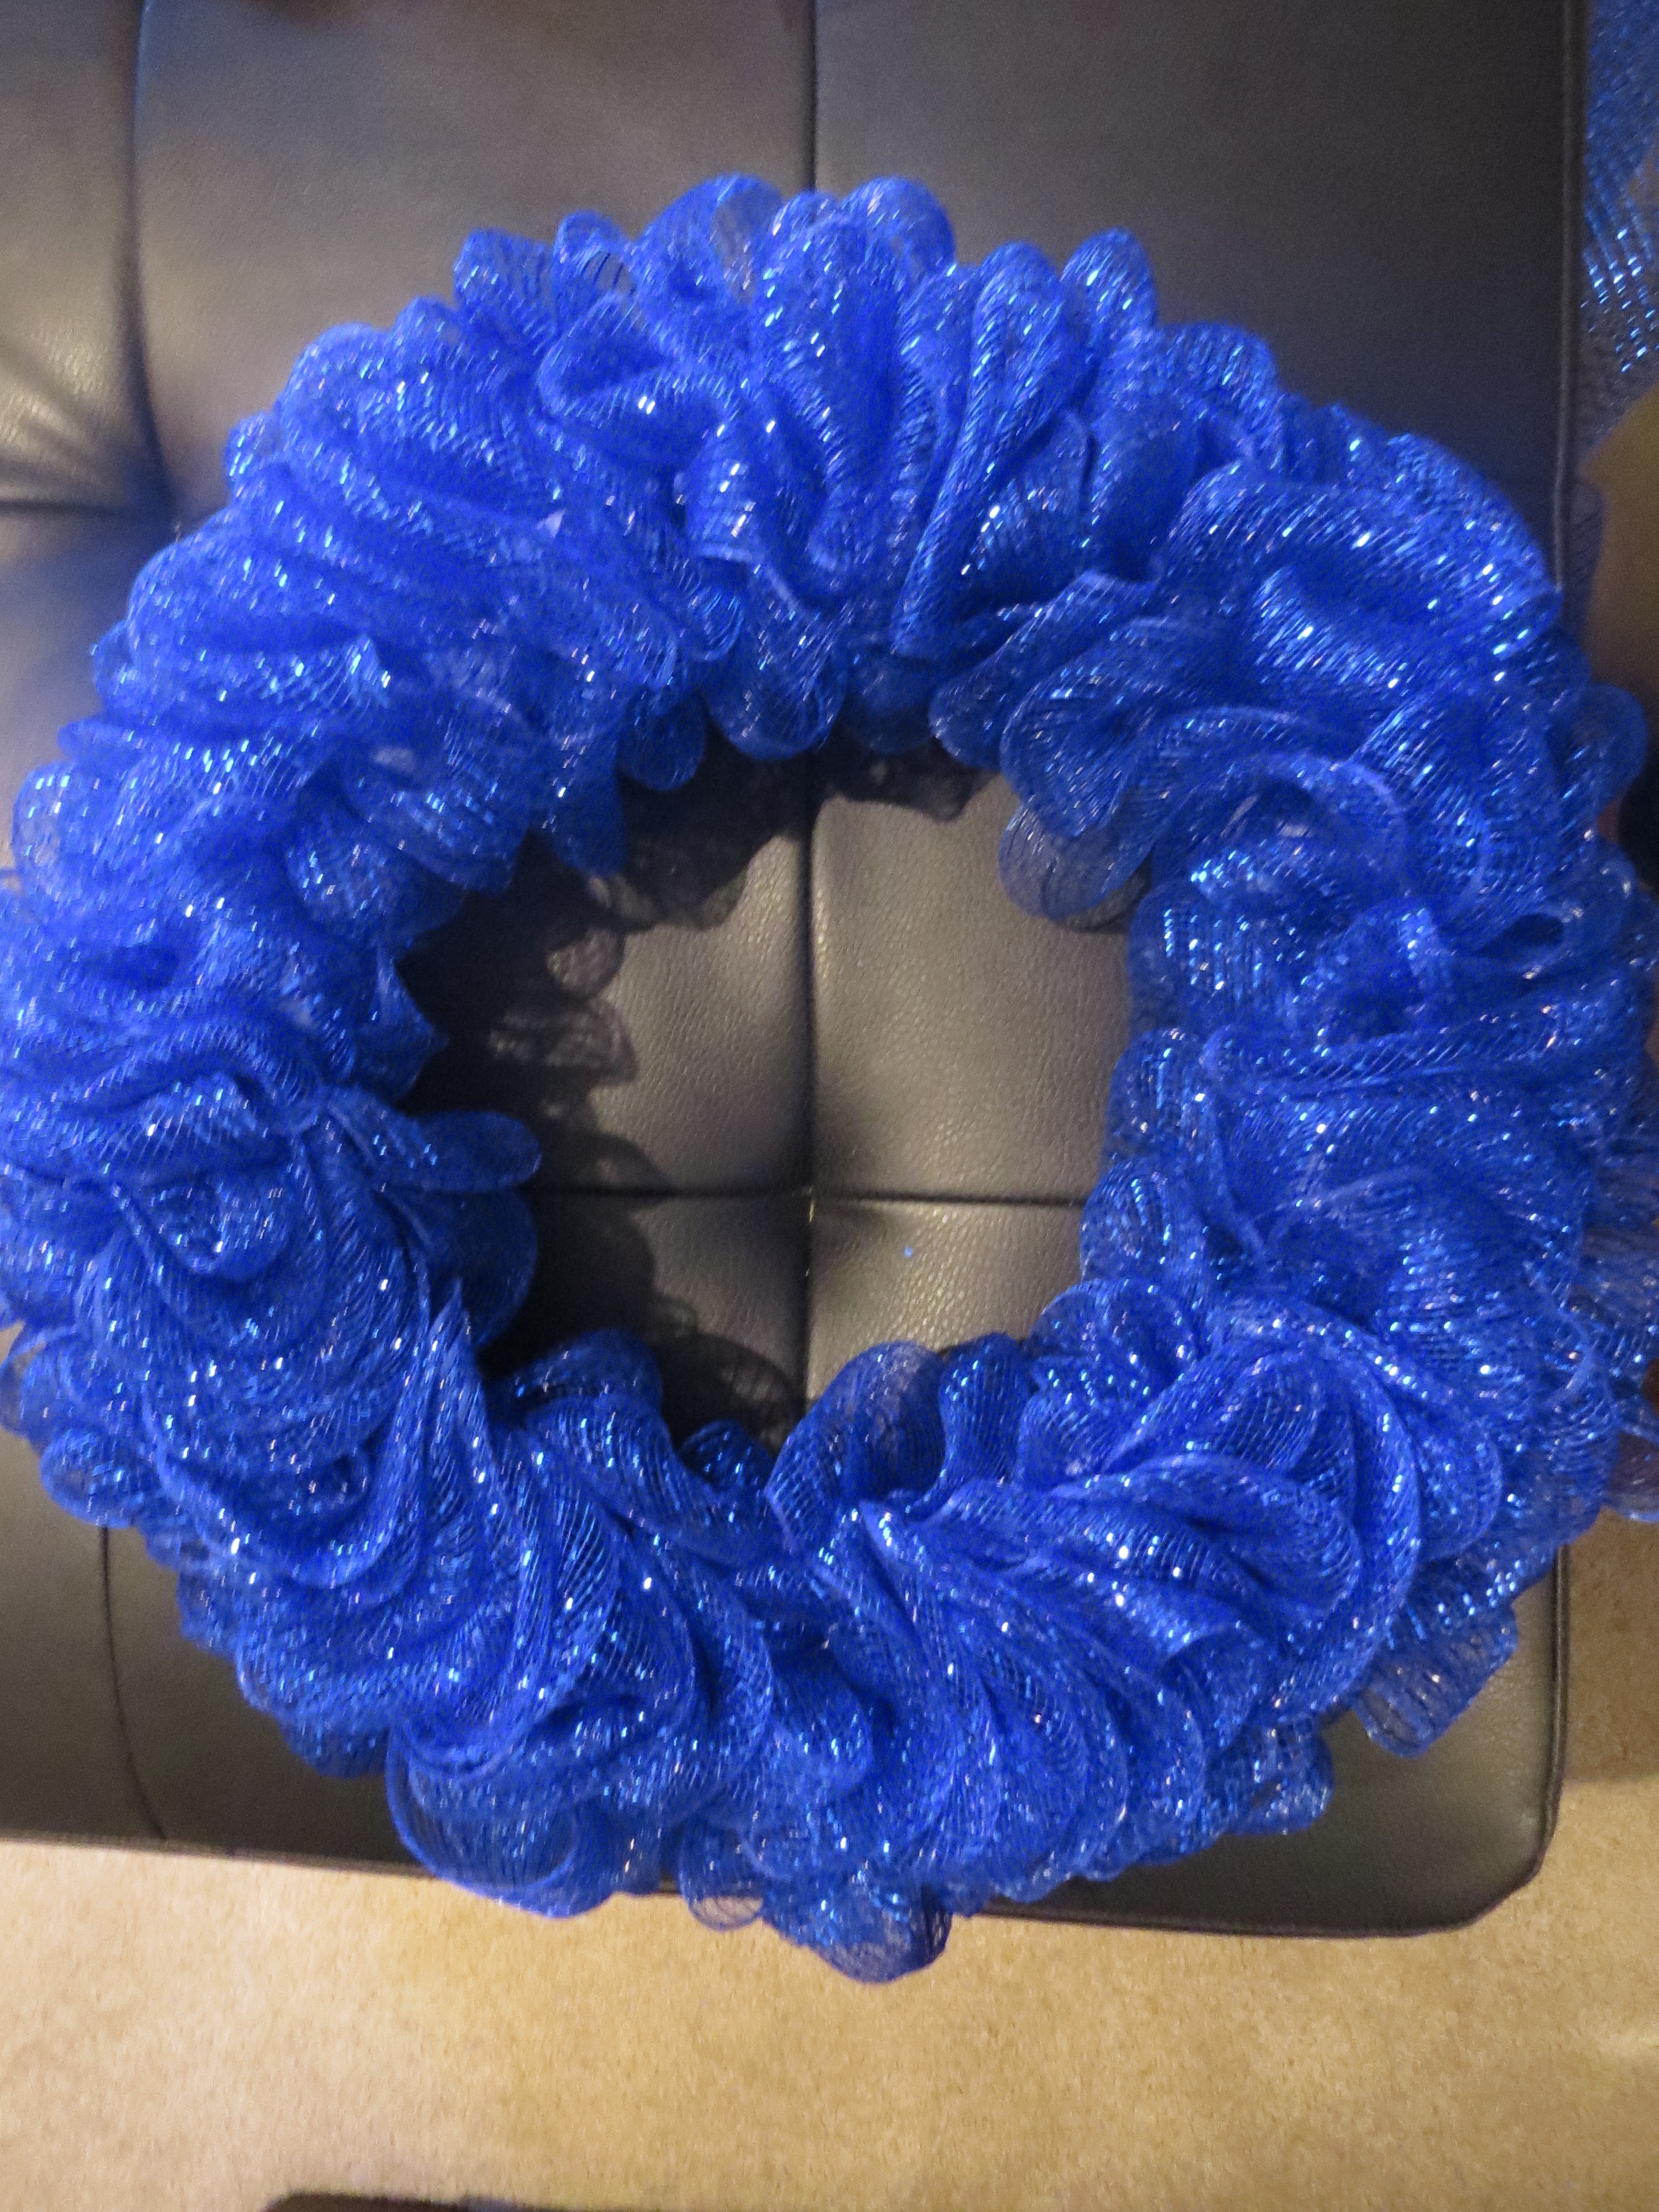
6. I placed mesh around the inner edge just as I did on the outer and front edges.
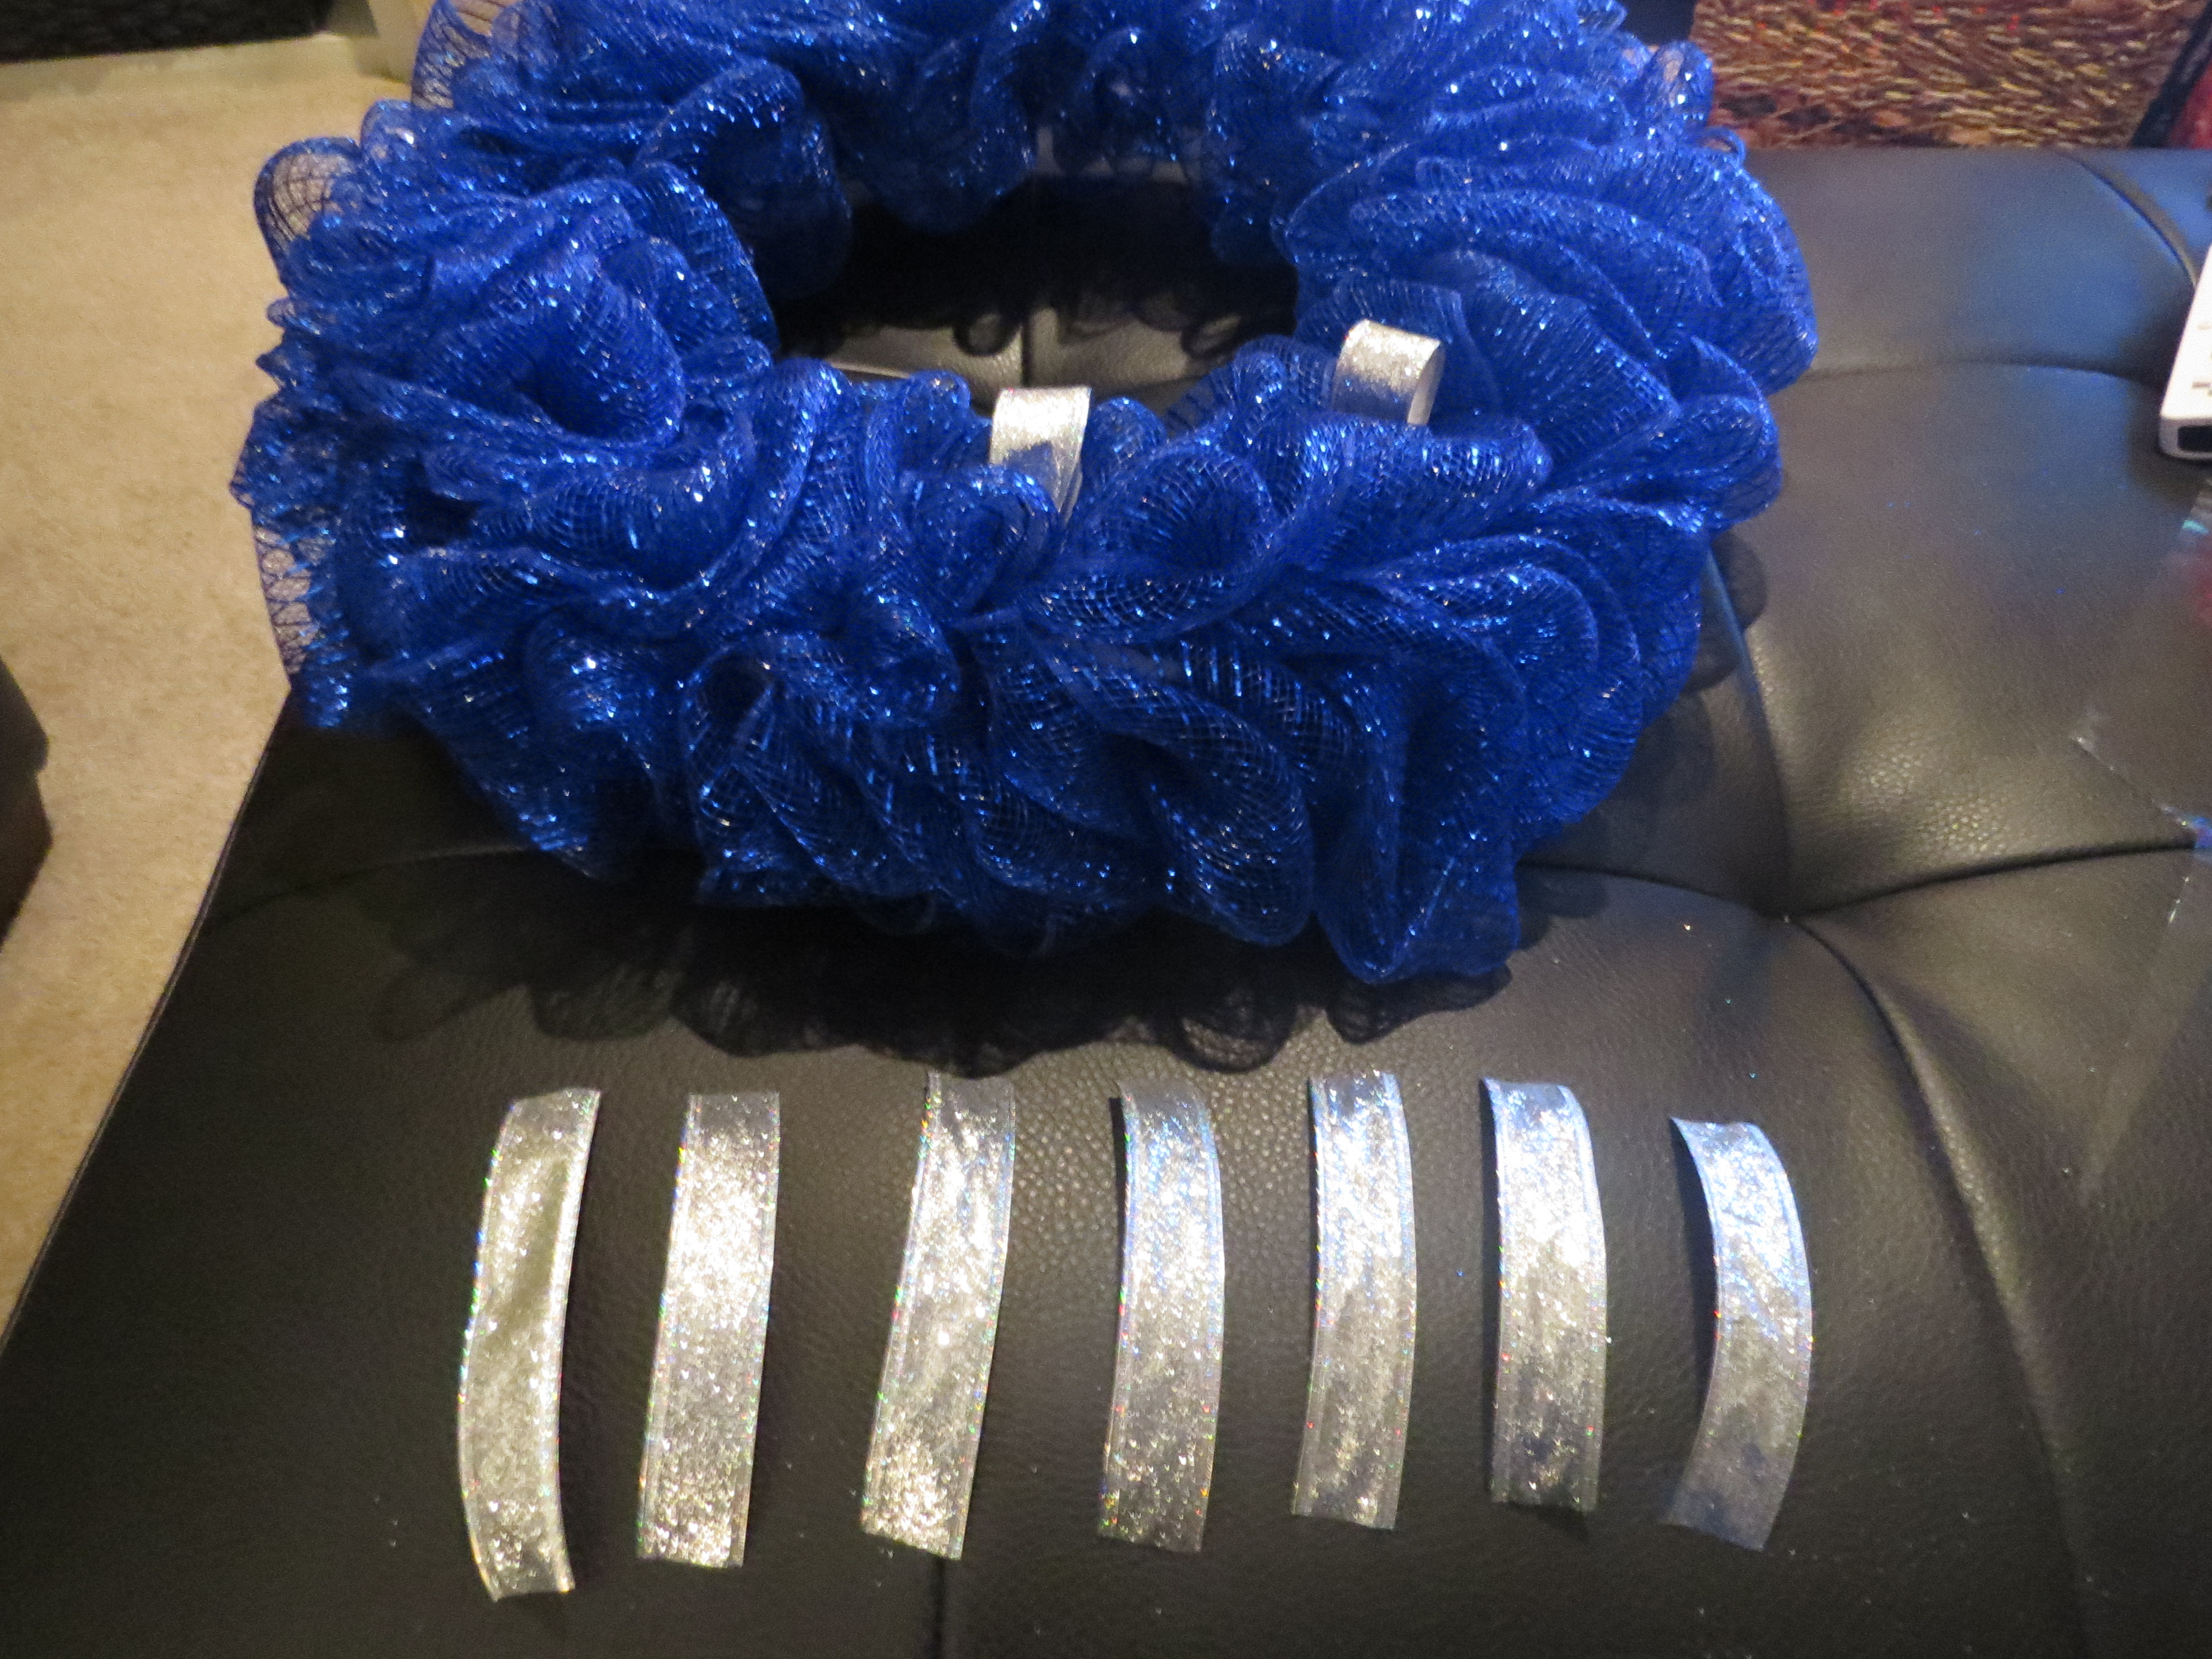
7. I took one of the spools of ribbon and cut it into 4″-6″ strips.
A fair warning, you may want to reconsider using glittery ribbon. My living room looks like the exact location where disco died.

8. Make them into a loop with your fingers and secure them with a floral pin.
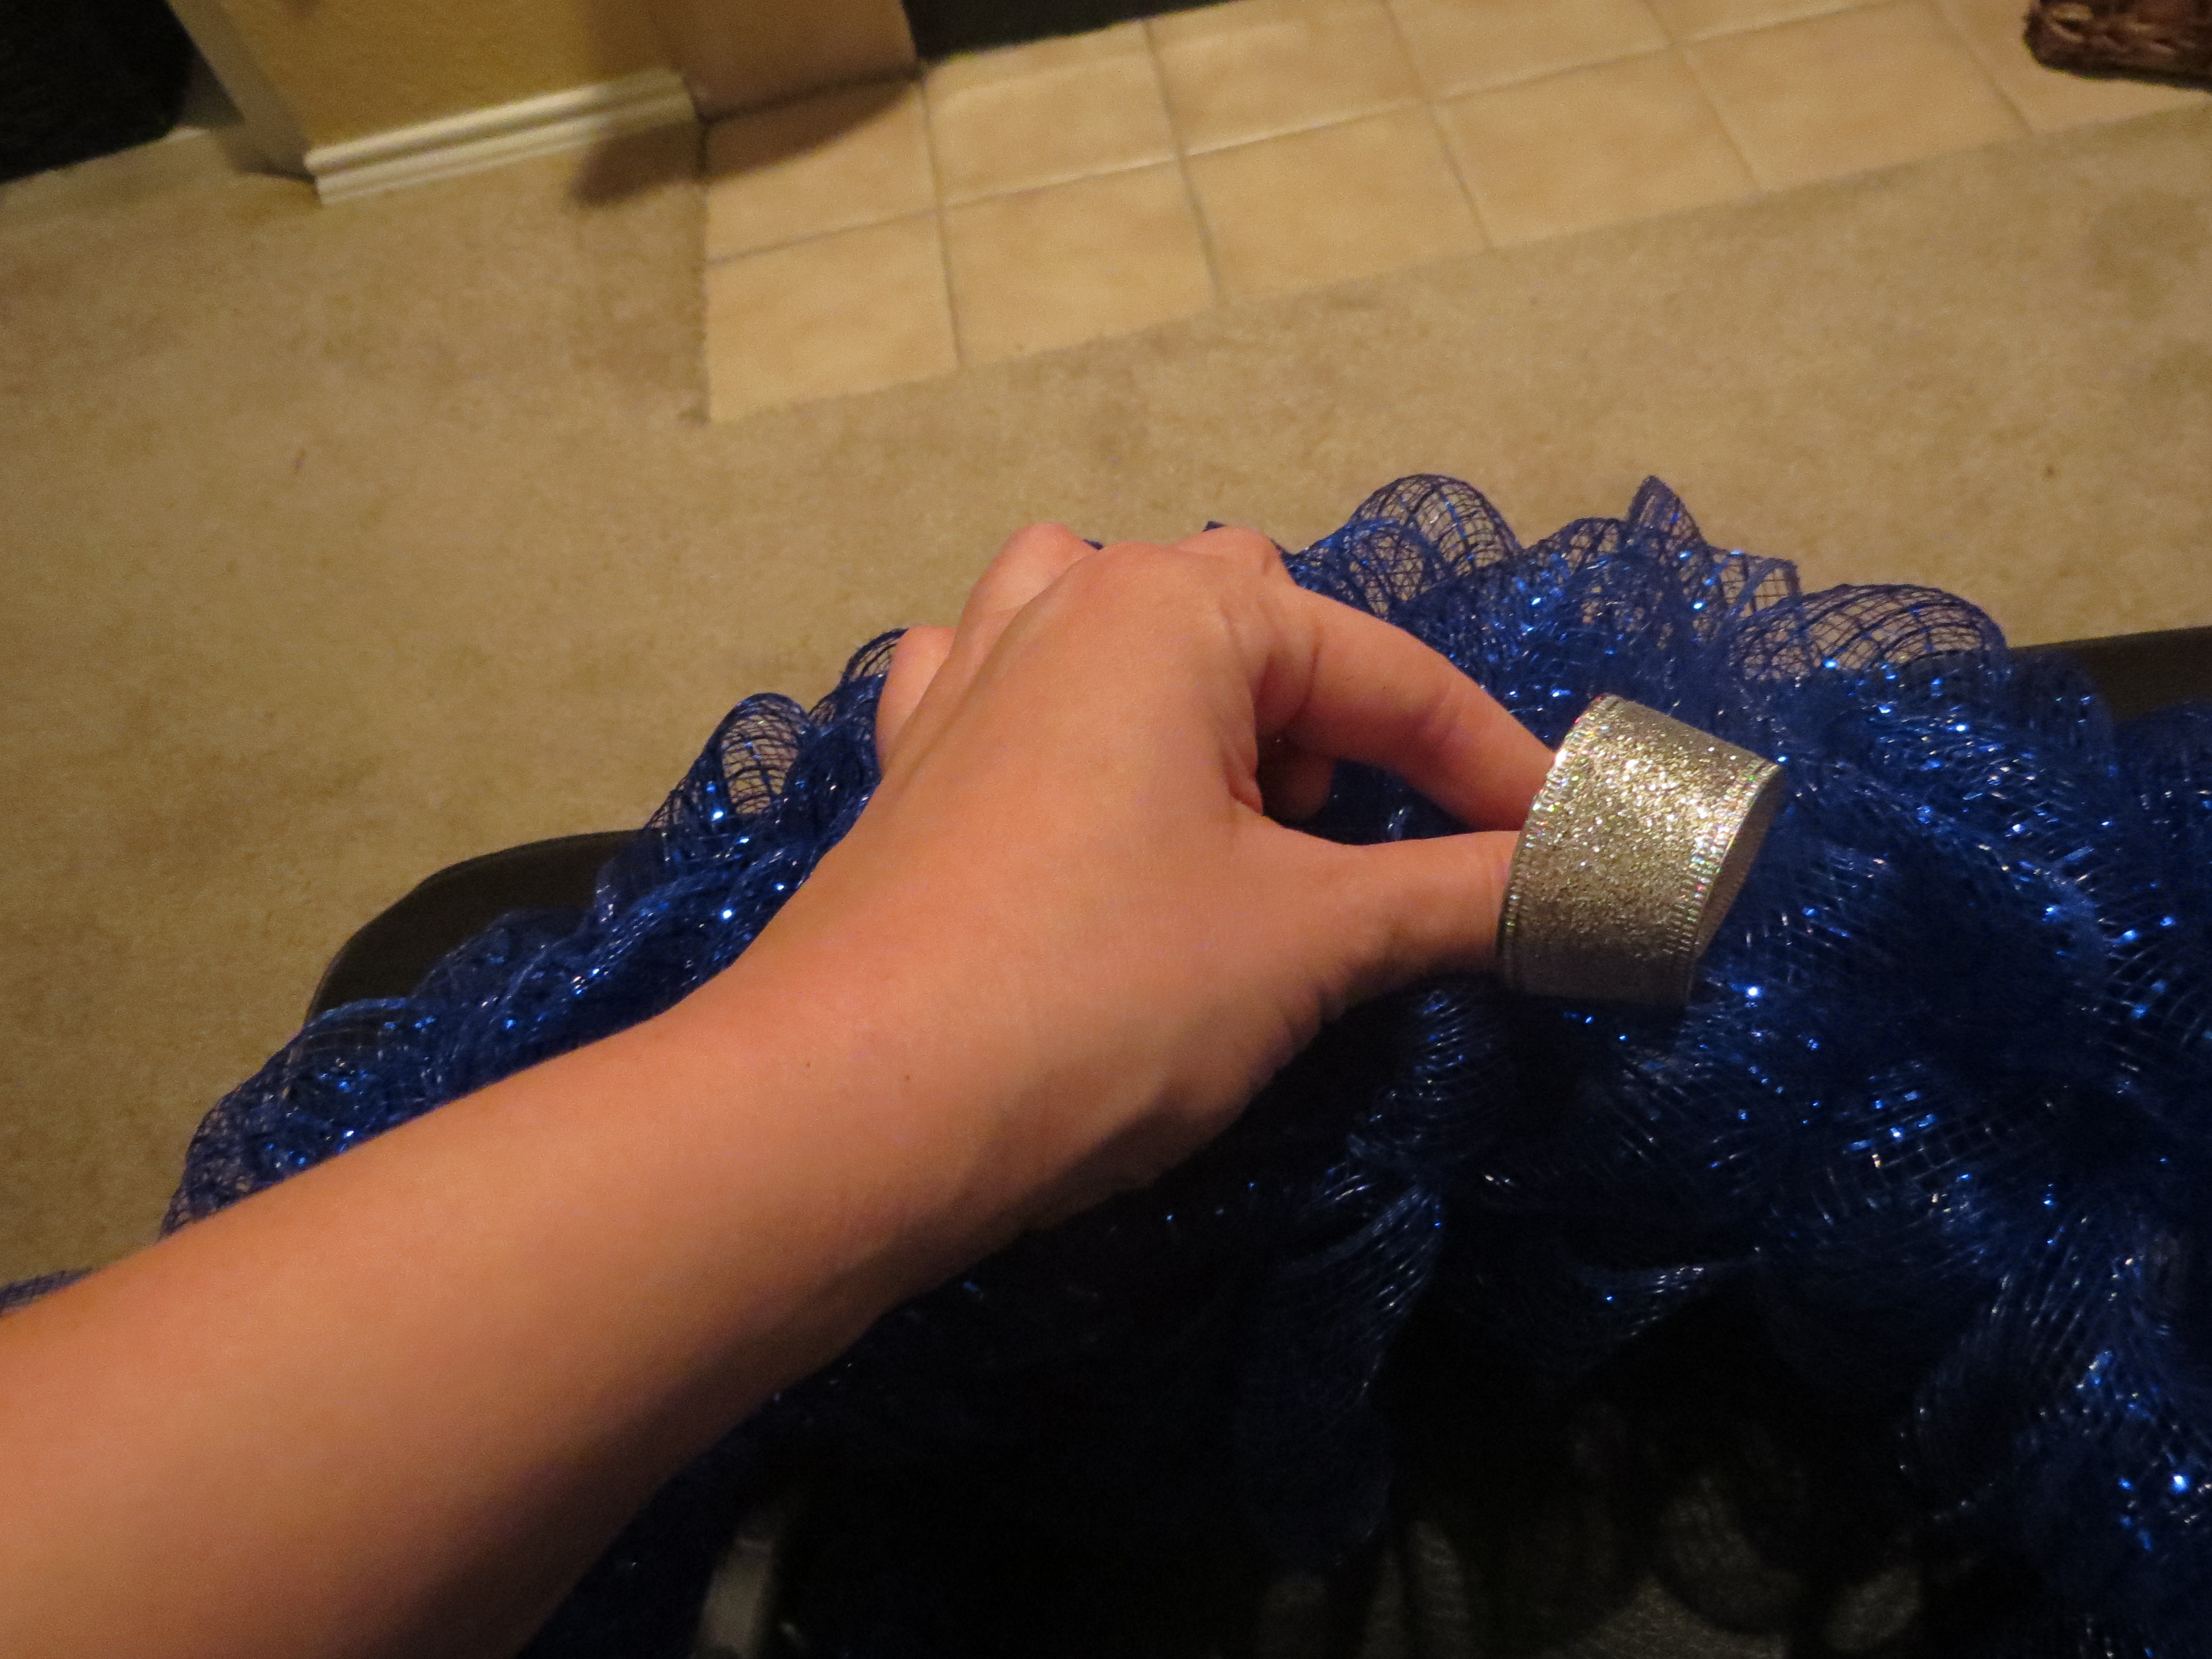
9. Pin them randomly around the wreath.
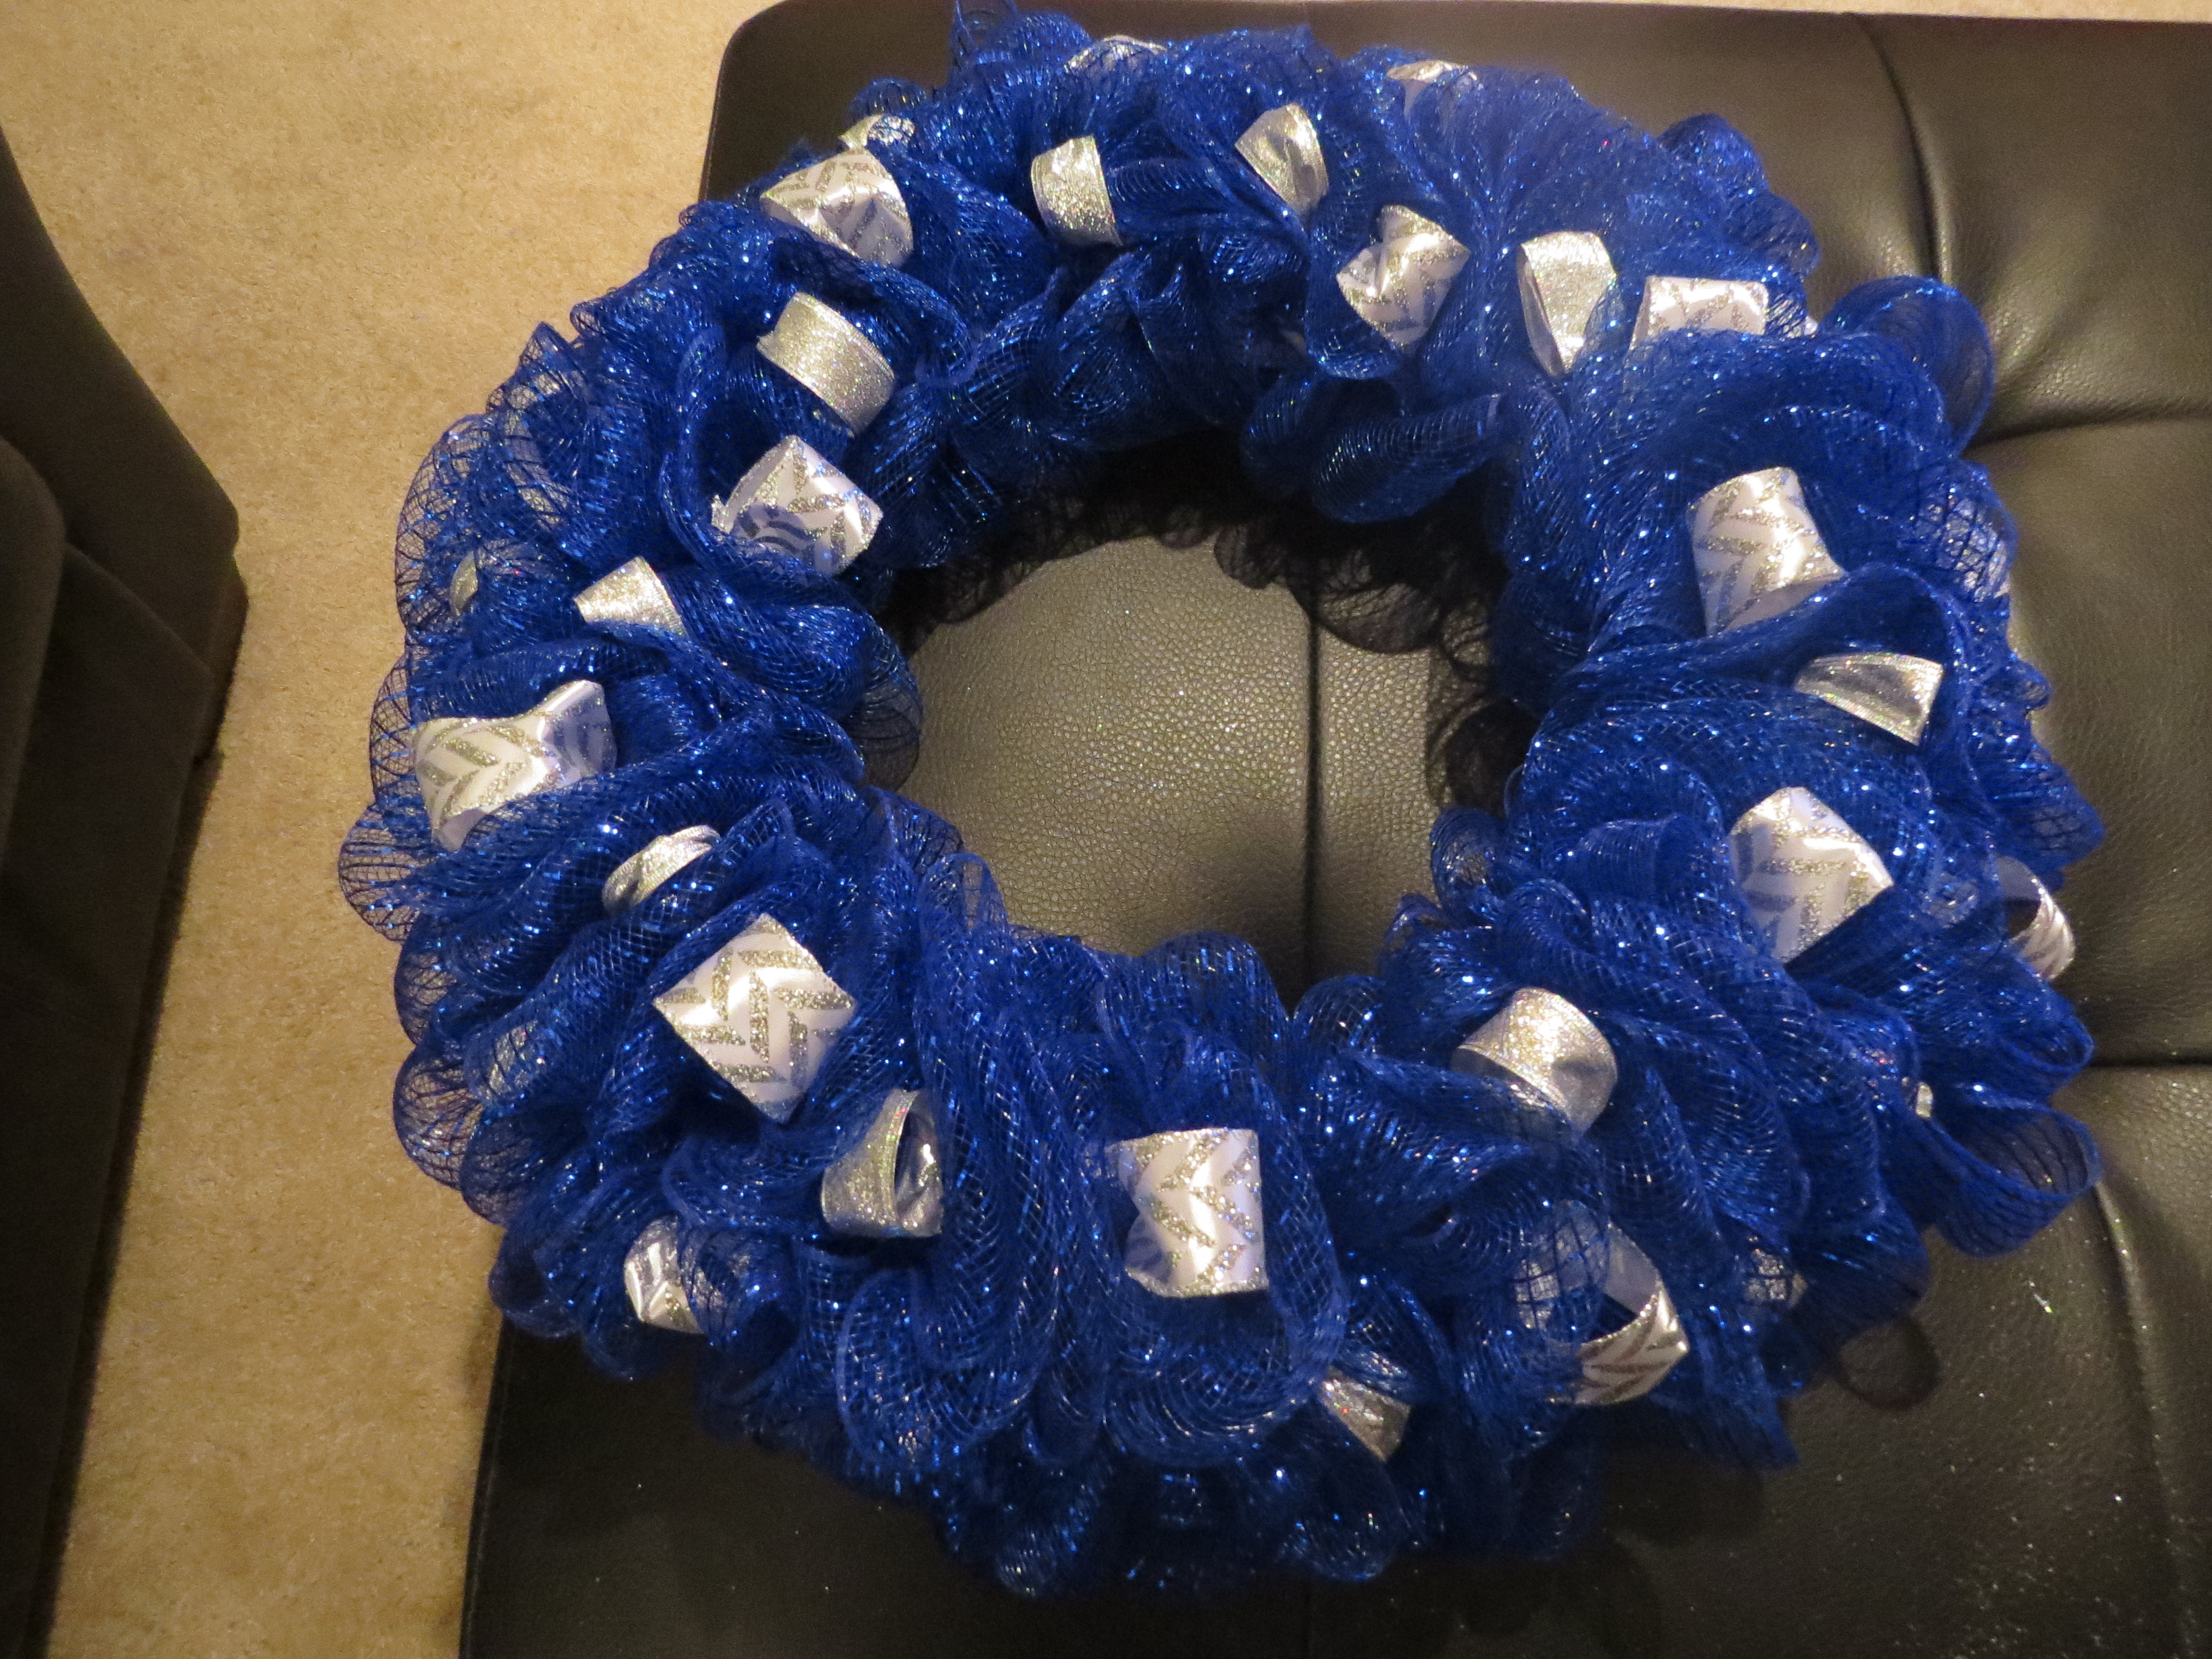
10. Repeat with the other spool of ribbon.

11. Once your wooden cutouts have dried, carefully glue them to your wreath. Luckily for me, my hands can no longer feel heat as I have destroyed them with heat styling my hair. Getting hot glue on my hands ain’t no thang. Glue the dreidels around the wreath as desired. You can find the dreidels I used on Amazon.
Finally, I adorned my door with my fabulous wreath!
I probably could not even sell this thing on Etsy for $1, but it makes me happy every time I walk through my front door!
Chag Sameach, y’all!
Marissa

Love this! I’ve made mesh wreaths before but never even knew about using floral pins and styrofoam! So much easier! Thanks! Love that you made a Hanukkah wreath! So adorable!
LikeLike
What size is the styrofoam wreath you started with?
LikeLike
Hi, Adrea! Thank you for your question. It’s been a while since I made this wreath, but I *believe* it is a 14 inch wreath like this one from Hobby Lobby: http://www.hobbylobby.com/Crafts-Hobbies/Basic-Crafts/Styrofoam/White-Extruded-Foam-Wreath—14%22/p/21298
LikeLike
Pingback: Nothing says the holidays (or in my case, any holiday) like a festive door decor… – Do it YourSelf
What a beautiful wreath. I couldn’t figure out how to get the bunches without cutting the mesh, how you did it is very helpful.
LikeLike
Thank you, Missy! This post is a few years old so it warms my heart when people find it each holiday season!
LikeLike
Thank you! I was looking for a tutorial like this, now I can be even more visibly Jewish for my anti-Semitic neighbours!
LikeLiked by 1 person